

A Step-by-Step Guide to Residential Roof Installation
To install a residential roof, begin with careful preparation: budget for materials, labour, and any necessary permits. Once you've secured the required permits, carefully strip off the existing roof and check for any structural damage. Choose your new roofing material based on its durability and appearance. Gather essential tools such as metal snips, a roofing hammer, and appropriate safety gear. Install an underlayment before securing the new roof covering, ensuring that you seal the edges properly. Finally, check that you comply with local regulations and consider consulting professionals for optimal results. Follow this guide for effective roof installation practices.
Key Takeaways
- Start by planning your budget carefully, factoring in materials, labour, and any necessary permits before commencing the installation.
- Obtain all required building permits and ensure compliance with local regulations to prevent any future issues.
- Remove the old roof with care, taking note of any damage to the decking and evaluating if repairs are needed.
- Choose suitable materials based on their durability, appearance, and the local climate, considering options like asphalt shingles, metal roofing, or clay tiles.
- Adhere to proper installation methods and safety practices to ensure a secure, leak-proof roof that meets safety standards.
Preparation Stage
Before starting your roof installation project, it's crucial to prepare thoroughly. First, plan your budget—decide how much you can allocate for materials, labour, and necessary permits. Consider that labor accounts for approximately 60% of new roof costs when setting your budget.
Choose your roofing material wisely, whether it's tiles, shingles, or metal, ensuring it fits your budget and looks right for your home. Take into account the design, size, pitch, and local weather conditions to make an informed choice.
Engaging as a homeowner during this phase is important. Ensure you secure the required building permits before any work begins. A professional assessment of your current roof can help determine if a complete replacement is needed. Additionally, consider the evaluation of roof design to ensure the chosen materials will perform well in your local climate.
Next, prepare your site by clearing vehicles and obstacles from your driveway and garage. Protect your garden and furniture with tarpaulins, and secure loose items indoors to prevent damage from vibrations. It's also advisable to maintain three points of contact when on ladders to enhance safety during the project.
If you have specific instructions about your landscaping, communicate these clearly, and keep pets safely away from the work area.
Finally, mow your lawn for easier cleanup and cover any open drains to avoid blockages. Ensure there's access to a power supply for the roofing team.
Proper preparation lays the foundation for a smooth installation process.
Remove Existing Roof
When removing an existing roof, safety and efficiency are paramount. Start by protecting your property with tarps or covers over plants and open drains to prevent damage from debris.
Follow these steps for an effective removal:
- Begin at the Apex: Start at the roof apex and remove the ridge caps first. Use tools such as garden forks or notched shovels to strip off shingles and extract nails efficiently.
- Work in Sections: Remove shingles in manageable sections, working your way down the roof. Direct debris onto tarps or into skips for straightforward disposal. Regular inspections can help identify potential issues before they escalate.
- Clear the Decking: Once the shingles are removed, take out old nails and flashing. Check the roof decking for any soft or damaged spots that may require repair before new materials are installed. Properly removing old nails ensures a solid new roof installation.
After the roof has been removed, ensure all debris is collected and disposed of properly.
A clean roof decking is crucial for the next steps in your installation process. Remember, adhering to roofing safety and thorough preparation is key to a successful new roof.
Assess Roof Damage

To effectively assess roof damage, start by inspecting the condition of the roof deck. Look for signs of rot, sagging, or any compromise to its structural integrity, as these can indicate more serious issues. Additionally, understanding insurance claims adjuster methods can help in documenting damage accurately and determining the necessary steps for repairs or replacement. Regular inspections should also include checking for flashing issues and damaged materials such as tiles or flashings to determine whether repairs or a complete replacement is required.
Inspect Roof Deck Condition
Inspecting the condition of your roof deck is crucial for spotting any potential damage that could affect the overall integrity of your roofing system.
Start by checking the roof deck materials for signs of wear and tear. Pay close attention to:
- Water Damage: Look for visible signs of water damage, rot, or sagging areas.
- Fasteners: Ensure that fasteners are secure and properly installed, as loose ones can compromise support.
- Bracing and Connections: Verify that all trusses and connections are well-braced and aligned.
While inspecting, assess the state of the plywood or OSB board for cracks, splits, or any instability in support structures like trusses and rafters. It is also important to recognize that professional inspections provide a comprehensive assessment of roof condition, ensuring no issues are overlooked. Regular roof inspections, as recommended, can significantly contribute to early detection of issues that might otherwise escalate into costly repairs.
Also, check that ventilation is adequate to prevent condensation or ice build-up, which can further harm the roof deck.
After your inspection, make a detailed record of your findings, noting the locations and types of issues discovered.
This report will be essential for any future repairs or replacements.
Identify Damaged Materials
Inspecting your roof for damaged materials is crucial for maintaining its integrity and avoiding costly repairs later on. Begin with a thorough assessment to spot visible issues, such as lifted or cracked tiles, and examine the condition of the flashing, gutters, and downpipes. Pay attention to material deterioration, including blistered or missing tiles, as well as potential hail damage. Regularly inspect your roof for damage to identify potential issues early on. Conducting these inspections can help you recognize common leak areas that are prone to damage.
| Damage Type | Signs to Look For | Repair Options |
|---|---|---|
| Tile Damage | Cracks, curling, granule loss | Replace damaged tiles |
| Flashing Issues | Gaps, rust, loose seals | Reseal or replace flashing |
| Gutter Problems | Clogs, water backups | Clean or replace gutters |
| Interior Signs | Water stains, mould, drafts | Fix leaks and insulate |
Document your findings carefully, noting any areas needing urgent attention. If you're uncertain about the extent of the damage or the best repair options, consider consulting a professional contractor. Regular inspections and maintenance will help ensure your roof lasts longer and protects your home from further damage.
Choose New Materials
When selecting new roofing materials, it's essential to consider the types available and their costs.
Options such as asphalt shingles are economical, while slate and clay tiles provide durability and visual appeal but come at a higher price.
Weighing these factors will enable you to make a sensible choice that aligns with your budget, preferences, and local weather conditions.
Material Types Overview
Choosing the right roofing materials can significantly affect your home's durability, energy efficiency, and appearance. Here are some options to consider:
- Asphalt Shingles: Affordable and versatile, asphalt shingles are easy to install and require minimal maintenance, making them a popular choice.
- Metal Roofs: Lasting up to 50 years, metal roofs are durable and energy-efficient. They reflect heat, which is beneficial in warmer climates, but they require careful installation for optimal performance.
- Clay Tiles: With a lifespan exceeding 100 years, clay tiles aren't only fire-resistant but also visually appealing. However, their weight necessitates a strong supporting structure.
Don't forget about Synthetic Slate****, which offers the look of natural slate without the heavy weight and environmental drawbacks.
While Slate itself is durable and attractive, its weight can complicate installation.
Lastly, Composite Shingles can last for decades with proper care.
Each material has its own advantages and disadvantages, so it's wise to consider an environmental impact assessment to determine the best option for your home.
Cost Considerations
Choosing the right roofing materials affects both the lifespan and appearance of your home, as well as the total installation costs. Careful budget planning is crucial to prevent unexpected expenses during your roofing project. Here's a summary of material costs per square metre to aid your decision-making:
| Material Type | Cost Range (per sq m) |
|---|---|
| Asphalt Shingles | £36.50 – £94.00 |
| Clay Tiles | £129.00 – £269.00 |
| Concrete Tiles | £118.00 – £213.00 |
| Metal Roofing | £65.00 – £377.00 |
| Wood Shingles/Shake | £65.00 – £154.00 |
Labour costs can significantly impact your budget, generally around £50 per hour. More intricate roof designs or necessary structural repairs can further escalate expenses. Remember to include permits, which may add approximately £400, and warranties that can range from £400 to £1,600. By estimating these costs accurately, you can ensure your roofing project remains within budget while fulfilling your aesthetic and durability requirements.
Gather Tools

Gathering the right tools is essential for a successful roof installation. Organising and maintaining your tools ensures efficiency and safety.
Here's a list of must-have tools to get you started:
- Hand Tools:
- Metal snips, a roofing hatchet, hammer, pry bar, and utility knife are crucial for cutting and securing materials.
- Power Tools:
- A roofing nailer, drill, reciprocating saw, circular saw, and air compressor can significantly speed up the installation process.
- Safety Equipment:
- A safety harness, rope grab, ladder, hard hat, and gloves are necessary to protect against potential hazards.
Before you start, check the condition of each tool and carry out any necessary maintenance.
Ensure your tools are clean, sharp, and functioning properly; this will enhance your efficiency and safety on the job.
Organising your tools in a toolbelt or storage area will allow easy access when needed.
Obtain Permits
Before starting your roof installation, it's crucial to obtain the necessary permits to ensure your project meets local regulations. Check with your local council to see if your project requires a permit. Generally, new roofs, re-roofs, and significant repairs need permits, whereas minor repairs under 10 square metres typically do not.
The application process often involves visiting your local council's office or their website. Be ready to submit required documents, which may include plans for review, especially if you're making structural changes or using new materials.
Some areas may also require inspections to ensure compliance with safety standards.
Not securing the required permits can result in fines, enforced removal of the roof, or complications when selling your property. Moreover, unpermitted work might lead to insurance issues that could affect your coverage.
Whether you're a homeowner taking on a DIY project or hiring a qualified contractor, it's vital to understand and adhere to local regulations.
Underlayment Installation

When you're ready to install underlayment, begin by preparing the roof deck to ensure a solid foundation for the layers to follow. Follow these straightforward steps for a successful installation:
- Fit Drip Edge: Install the drip edge along the eaves, cutting the flashing at an angle for easier fitting.
- Measure the Roof: Measure the roof dimensions to determine the correct size and type of underlayment required.
- Clear the Roof: Ensure the roof deck is free from debris for proper installation.
Once your roof deck is ready, unroll the chosen underlayment, aligning it with the drip edge and leaving a half-inch overhang. Secure it using roofing nails or staples spaced 15-30 cm apart.
Overlap each row by at least 15 cm to create a seamless barrier, smoothing out any bubbles or creases as you go.
When working around features such as vents or chimneys, carefully trim the underlayment to fit snugly and seal the edges properly.
Finally, inspect your work to ensure a watertight seal and compliance with local building regulations. By following these installation techniques, you'll lay a strong foundation for your new roof.
New Roof Covering Installation
When installing a new roof covering, it's essential to understand the different techniques suitable for your chosen materials.
Common options include asphalt shingles, metal sheets, and tiles, each requiring specific methods to ensure optimal performance and durability. Knowing these techniques will help ensure your roof not only looks appealing but can also withstand the elements effectively.
For example, properly securing tiles can prevent leaks during heavy rain, while using the right underlay with metal sheets can enhance their longevity.
Installation Techniques Overview
Installing a new roof covering requires essential techniques to ensure it's robust and weather-resistant. Here's a straightforward guide to the key steps involved in roof installation:
- Starter Shingles: Start by placing starter shingles at the bottom and sides of the roof. Staggering each row helps improve water runoff.
- Laying Roofing Material: Adhere to the manufacturer's instructions for your selected roofing material. Proper installation is crucial for durability and performance, so focus on the details.
- Sealing: Carefully seal around edges and vents. This is vital to prevent water leaks, which could result in expensive repairs down the line.
By following these techniques, you can ensure a secure and effective roof covering.
Remember that specific materials may require different methods. Always conduct a final inspection to ensure everything is correctly installed and sealed, giving your roof the best chance to endure the British weather.
Common Material Options
Choosing the right roofing material is crucial for ensuring your roof's longevity and performance. There are several options to consider.
Asphalt shingles are one of the most cost-effective choices, offering durability with a lifespan of 20-30 years. They're waterproof, fire-resistant, and wind-resistant, making them a sensible option. Prices typically range from £3.25 to £5.50 per square foot.
If you prioritise long-lasting durability, metal roofing is an excellent option, lasting over 60 years. It comes in exposed fastener and standing seam styles and is resistant to wind, fire, and snow. However, it's more expensive, with costs usually between £15.00 and £30.00 per square foot.
For flat roofs, consider PVC and EPDM membranes, known for their leak resistance and ability to reflect solar heat. PVC membranes last 15-30 years, while EPDM lasts 10-15 years, with prices ranging from £4 to £8 per square foot.
Additionally, you might explore natural materials like cedar shake for their unique appearance, or synthetic alternatives that replicate traditional styles without the higher costs. Each option has its own advantages, so choose one that best suits your roofing needs.
Ventilation and Flashing
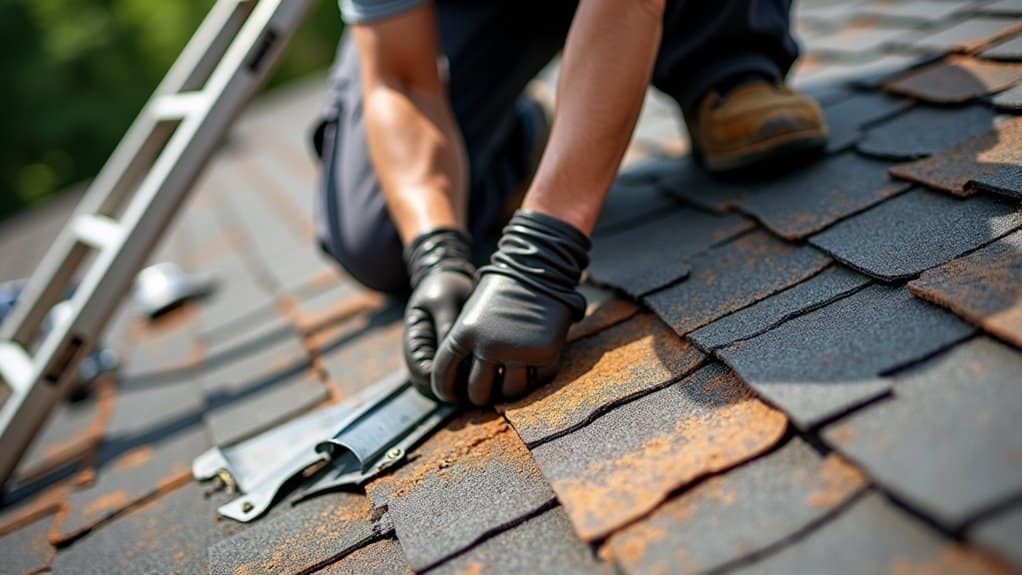
Effective ventilation and proper flashing are key to a successful roof installation. To ensure your roof performs optimally, pay attention to the right types of vents and follow essential installation steps.
- Choose Location: Place vents near the ridge for attic ventilation, or close to kitchens and bathrooms for effective exhaust.
- Cut Hole: Mark and cut a precise hole in the roof decking that matches your vent dimensions.
- Install Base: Secure the vent base to the roof using screws.
For flashing, follow these steps:
- Prepare Area: Remove shingles around the vent opening and apply a self-adhesive underlay.
- Cut Flashing: Cut the flashing to fit snugly around the vent.
- Install Flashing: Position the flashing over the vent, securing it with nails and roof sealant.
Always apply a generous amount of sealant around the edges of the vent to prevent leaks. Proper installation and sealing are crucial to avoid future damage.
Collaborating with your contractor can further improve the efficiency of your ventilation system, ensuring your roof is well-prepared for various weather conditions.
Finishing Touches
When completing your roof installation, the finishing touches are crucial for ensuring durability and performance.
Begin with the ridge cap installation, securing it firmly over the roof's ridge to create a tight seal. This step is vital to prevent water damage from wind-driven rain, so ensure it's fastened properly to avoid any uplift.
Next, pay attention to the final shingles. Cut them to fit neatly at the ridge and secure them with finishing nails. Be sure to seal any cutouts and joints to prevent leaks. Adding extra layers can improve both appearance and durability, so keep this in mind as you finish the shingle application.
Proper vent installation is also essential for attic ventilation. Position vents at the highest points and apply flashing around them to prevent leaks. Use sealants to secure the vent flanges and the edges of the flashing, ensuring a solid barrier against moisture.
Lastly, carry out a thorough cleanup to remove all debris and tools. Inspect the entire area for quality and craftsmanship, addressing any defects promptly.
Additional Considerations

Before you begin the installation process, it's important to consider a few key factors that can significantly influence your roofing project. Taking these points into account early on can lead to a smoother experience and better results.
1. Safety Precautions: Always prioritise safety by wearing the appropriate protective gear and using the right tools.
Ensure your workspace is free from hazards to avoid accidents.
2. Environmental Impact: Think about how your roofing materials will affect the environment.
Choose sustainable options when possible and make sure to dispose of old materials correctly to reduce waste.
3. Permits and Regulations: Obtain all necessary permits from your local council.
Familiarise yourself with local building regulations to prevent any legal issues and to ensure your roof meets compliance standards.
Material Selection
Choosing the right materials for your roofing project is crucial, as it impacts your budget, the roof's lifespan, and its performance.
Begin by considering your budget; asphalt shingles are a cost-effective and popular choice, while metal roofing, though more expensive upfront, offers long-term value. If you prefer a unique look, slate and tile roofs are attractive but come at a higher price.
Durability is another important aspect. Asphalt shingles usually last around 20 to 30 years, while metal roofs can last over 50 years with proper maintenance.
For a more sustainable option, synthetic composite shingles are durable and have a lower environmental impact due to their energy efficiency.
Consider installation and maintenance as well. Asphalt shingles are straightforward to install, whereas metal roofing requires specialised techniques.
Also, think about your local climate; clay tiles perform well in hot areas but can be vulnerable to cold weather.
Ultimately, let your aesthetic preferences guide your choice. Whether you value durability, cost, or environmental impact, each material has its benefits.
Choose wisely to ensure your roof meets your needs and respects the environment.
Professional Consultation

Professional consultation is vital for a successful roofing project. Engaging a professional offers several benefits that can greatly enhance your roofing experience. Here are three key advantages:
- Expert Guidance: Consultants provide invaluable advice from the initial assessment to project completion, thanks to their extensive knowledge and experience.
- Tailored Solutions: They assess your specific needs and challenges, creating customised plans to address your unique roofing requirements.
- Accurate Assessments: Using advanced technology, such as drones and moisture scanners, professionals ensure precise evaluations of your roof's condition.
Additionally, the expertise of certified professionals is crucial. Their years of experience help you navigate local building regulations and legal requirements.
Their familiarity with techniques like thermal imaging enables accurate diagnostics and effective solutions.
Frequently Asked Questions
How Long Does a Roof Installation Typically Take?
A roof installation usually takes between 1 to 10 days, influenced by factors such as the size of the roof, chosen materials, and the expertise of the contractor. For instance, smaller roofs may be completed quicker, while larger or more complex designs could take longer. Weather conditions can also play a significant role in the timeline.
What Factors Influence Roofing Costs Besides Materials?
Labour costs, planning permissions, weather conditions, roof accessibility, contractor experience, and roofing warranties all affect roofing expenses. Each factor can significantly influence your overall budget, so it's essential to consider them when planning your roofing installation. For instance, if your roof is difficult to access, labour costs may rise due to the increased effort required. Similarly, experienced contractors may charge more, but they often provide a higher quality of work, potentially saving you money in the long run.
Can I Install a Roof Myself, or Should I Hire Professionals?
You can try DIY roofing, but always prioritise safety. If you lack experience, you risk injury and a substandard finish. Hiring professionals ensures expertise, compliance with regulations, and dependable installation, ultimately saving you time, money, and potential future issues. For example, a poorly fitted roof can lead to leaks and costly repairs down the line.
How Often Should I Inspect My Roof After Installation?
Consider your roof as a vital protective barrier. It's advisable to inspect it at least twice a year to maintain its integrity. You may need to adjust this frequency depending on the roof's age and local weather conditions. For instance, after a particularly harsh winter or a storm, a thorough check can help identify any potential issues early on.
What Are Common Signs of Roof Damage to Look For?
Look out for signs such as worn or damaged shingles, curling edges, leaks, and water stains. Regularly checking for leaks is crucial, as ignoring these problems can result in expensive repairs and further damage to the structure.
Conclusion
Congratulations on completing your roof installation! You've taken an important step in protecting your home from the elements. Just as a solid roof keeps out rain and wind, your new installation will safeguard your property for many years.
Regular maintenance is essential—think of it like servicing your car; it ensures everything runs smoothly. With quality materials and proper care, your roof will remain resilient, providing a safe space for everyone inside.


