

How to Fit Fascia Capping Boards: A Quick Guide
To fit fascia capping boards:
- Measure existing fascia accurately, accounting for overlaps and joints.
- Clear work area and set up a sturdy ladder.
- Cut boards to size, adding 5 cm for secure fitting. Miter corners at 45-degree angles.
- Secure boards to existing fascia with nails or screws, leaving a 4mm expansion gap at ends.
- Apply exterior-grade sealant to joints and edges for waterproofing.
- Fill gaps or nail holes with putty and tidy up.
This straightforward approach ensures a professional-looking installation that protects your roof structure.
Remember to prioritise safety when working at height and use proper tools for the job.
Key Takeaways
- Measure your fascia precisely, including length, width, and thickness. Don’t forget to account for overlaps and joints.
- Clear the work area of debris, set up safe access, and remove guttering. Safety first!
- Cut capping boards to size, adding 5 cm for a snug fit. Miter corners at 45-degree angles for a professional finish.
- Fix boards with nails or screws, leaving a 4mm gap for expansion. Use a spirit level to ensure they’re dead straight.
- Apply exterior-grade sealant to joints and edges. This’ll keep the rain out and your fascia looking top-notch for years.
Measuring Your Existing Fascia
Measuring Your Existing Fascia
First, accurately measure your existing fascia using a tape measure. Get the length from end to end, as this affects how your new capping boards will fit. UPVC solutions are brilliant for fascia capping boards, offering durability and style. They’re rot-resistant and won’t warp, ensuring long-lasting performance.
Next, jot down the width and thickness of your current fascia boards. Don’t miss any returns or lips, as these impact the measurements for your new capping boards. If you’re replacing the entire fascia, measuring the existing board dimensions helps you choose the right materials.
To check your fascia’s condition, use a pry bar. Solid wood should resist penetration, showing it’s not rotted. This test helps you decide whether to replace the fascia entirely or if capping boards will do.
When measuring, factor in any overlaps or joints in the existing fascia. These details affect the overall length and fitting of your new capping boards.
Accurate measurements are crucial for a smooth installation. Taking time to measure carefully ensures your new fascia capping boards fit perfectly, improving your home’s look and protection.
Preparing the Work Area

Preparing the Work Area
With measurements sorted, it’s time to get your workspace ready for fascia capping. Clear away any rubbish and set up a sturdy ladder or scaffold with guard rails. For roofs over 2 metres high, scaffolding is a must under the Work at Height Regulations 2005, especially for commercial jobs.
Make sure you’re following these rules to avoid legal trouble.
Take off any existing guttering to fit the new fascia boards properly. Check the old timber fascia for rot or damage – only use sound wood for capping. Sort out any issues before moving on.
Get all your tools and materials ready, including caulk, fasteners, and fascia boards. Having everything to hand will make the job go smoother.
Double-check you’ve got all you need before starting.
Cutting Capping Boards to Size

For precise fascia capping board cuts, measure the existing timber fascia carefully, adding 5 cm for a secure fit.
Use a circular saw or mitre saw to cut along clearly marked lines, and always wear safety goggles.
After cutting, check the fit against the structure to ensure proper alignment before installation.
This straightforward approach will save time and ensure a professional finish to your DIY project.
Measuring for Precision Cuts
Measure your existing fascia board accurately, ensuring full coverage from end to end. This prevents gaps during installation.
Fix a tape measure to the rafter for precise measurements, adding 5 cm to the height for a proper fit over rafter ends.
Record measurements for each section needing capping boards to determine required materials. When cutting, use a circular saw for clean, straight cuts. Always double-check measurements before cutting to avoid waste.
For fascia boards meeting at corners, mitre the ends of capping boards at 45-degree angles for a professional finish. This step demands extra care, so measure twice before cutting.
Remember to measure each section individually, as lengths may vary along the roofline.
Accurate measurements and precise cuts ensure a seamless fit for your fascia capping boards, resulting in a more durable and attractive finish for your home’s exterior.
Safe Cutting Techniques
Cutting capping boards to size needs care and precision. For clean, accurate cuts, use a circular saw and secure boards on saw horses. Double-check measurements and mark cutting lines clearly with a pencil or chalk to avoid costly mistakes. UPVC solutions are durable and stylish, ideal for fascias and soffits in Wickford, Essex.
Always wear safety glasses to protect your eyes from debris. Keep hands well away from the saw’s path to prevent accidents. For mitered corners, set the saw to a 45-degree angle for a neat join.
It’s best to have a helper hold the boards steady while cutting. If working alone, ensure boards are firmly secured before cutting.
Take your time and prioritise accuracy over speed for well-fitted fascias. These techniques will help you achieve professional results safely.
Securing Capping Boards in Place

Securing fascia capping boards properly is crucial. Align them with the existing timber fascia and use at least two 50mm Trimtop nails or 40mm capped screws per board. Start nailing 25-50mm from the top edge for a strong hold without damaging the board.
Leave a 4mm expansion gap at the ends to allow for temperature changes and prevent warping. This gap is vital for the boards’ longevity.
Use a spirit level to ensure the capping boards are straight and flush with the existing fascia. This step improves both looks and function, giving a professional finish.
For extra protection against damp, consider applying exterior-grade sealant along the seams after fitting. This will help prevent water damage and extend the life of your fascia capping boards.
Sealing Joints and Edges

To ensure proper waterproofing and protect expansion gaps, apply sealant to the joints and edges of your fascia capping boards.
Use an exterior-grade sealant and apply it evenly with a caulking gun, ensuring it fills all gaps for a watertight seal.
Pay close attention to where the capping board meets the existing fascia, adding a bead of sealant for extra protection against damp.
This step is crucial for maintaining your home’s integrity, much like wearing wellies on a rainy day keeps your feet dry.
Caulking for Waterproofing
Waterproofing is crucial when fitting fascia capping boards. To ensure a watertight seal, apply caulk to joints and edges where the fascia meets existing structures. Choose an exterior-grade caulk with a 10-20 year lifespan that works with both wood and PVC materials.
Regular checks are key for maintaining your roofing system, including fascia boards and caulking. These inspections help spot potential issues early, preventing costly repairs.
Clean the areas to be caulked, ensuring they’re dry and free of debris. Apply a continuous bead of caulk along all seams and joints, focusing on gaps. Use a caulking tool or your finger to smooth the bead for a neat finish. This prevents water infiltration that can cause wood rot and structural damage.
Let the caulk cure for at least 24 hours, or as the manufacturer suggests, before exposing it to moisture or painting. Proper setting is vital for effectiveness.
Regularly check caulked areas for wear or cracking. Reapply caulk as needed to maintain a watertight seal and extend your fascia boards’ life. This proactive approach protects your home from water damage and expensive repairs.
Expansion Gap Protection
Expansion gaps are crucial for protecting fascia capping boards from damage caused by temperature changes. Leave a 4mm gap at each board’s ends to allow for natural movement, preventing warping or buckling. Regular roof checks help ensure these gaps are working properly.
For a tidy look that maintains function, use joint mouldings to cover the gaps. These not only improve appearance but also offer extra protection against moisture.
Sealing joints and edges is key for durability. Apply exterior-grade sealant to:
- Create a waterproof barrier
- Stop moisture penetration
- Reduce rot risk
- Extend board life
When applying sealant, ensure even coverage, especially where boards meet. Regular checks and upkeep of these seals are vital to prevent water damage over time.
Finishing Touches and Cleanup
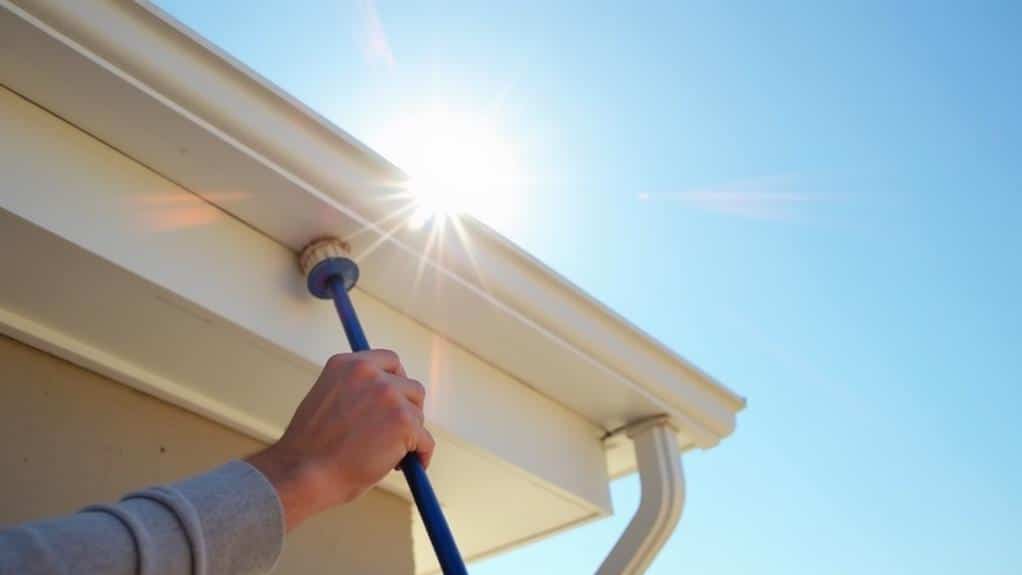
After installing fascia capping boards, focus on finishing touches and cleanup. Seal gaps and nail holes with body filler putty or caulk to prevent moisture entry.
Apply putty with a knife, scraping off excess for a neat finish. Regular upkeep, including gutter cleaning, is crucial to protect fascia boards and the roof from water damage.
Fit drip edges atop rafters and fascia to direct water away, safeguarding the boards from moisture.
Inspect the installation thoroughly, checking for misalignments or gaps that might affect structure or appearance. Sort these issues promptly to ensure long-lasting fascia capping boards.
Lastly, tidy up the work area. Clear away debris, old materials, and tools for safety and improved aesthetics.
This final step enhances the overall look and prevents potential hazards around your property.
These finishing touches and cleanup steps ensure a professional-looking, durable fascia capping board installation.
Maintenance and Care Tips

To maintain your fascia capping boards:
- Inspect every six months for wear or damage
- Clean regularly with mild soap and soft brush
- Clear gutters twice yearly to prevent overflow
- For wooden fascia, repaint every 3-5 years with quality wood preservatives
- Fix any cracks or rot immediately
Wooden fascia needs repainting every 3-5 years to protect against moisture and UV damage.
Tackle any signs of damage straight away to avoid water seepage and further issues.
Key tips:
- Clean with mild soap and soft brush
- Check twice yearly for problems
- Repaint wooden fascia every 3-5 years
- Repair damage promptly
Always follow the manufacturer’s guidelines for your specific fascia material.
This ensures you’re using the best care practices for your capping boards.
Frequently Asked Questions
How to Fit Fascia Capping Board?
Fitting fascia capping boards is a straightforward DIY job for UK homeowners. Choose suitable materials and basic tools from your local DIY shop. Measure carefully and secure the boards firmly. Ensure proper alignment – think of it as hanging a picture frame, but on a larger scale. Regular maintenance, like an annual clean and check, will keep your fascias looking top-notch for years to come. With a bit of patience and attention to detail, you’ll have your fascias sorted in no time.
What Is the Difference Between Fascia Board and Capping Board?
Fascia boards and capping boards serve different purposes in roofing. Fascia boards, typically made of wood or PVC, provide crucial structural support at the edge of your roof. They’re the boards you see when looking up at the roofline. Capping boards, on the other hand, are fitted over the fascia to enhance appearance and protect against moisture. Think of them as a raincoat for your fascia. Installation methods differ: fascia boards are fitted directly to roof rafters, while capping boards are attached to the fascia itself. Many homeowners overlook proper maintenance, leading to issues down the line. Regular checks and timely repairs can save you a pretty penny in the long run.
How to Attach Fascia Board?
You’ll need a saw, drill and spirit level. Fit fascia boards using galvanised nails or screws, taking care not to overtighten. Ensure proper alignment and seal joints. Choose from timber, PVC or aluminium. For wooden boards, regular inspection and painting are crucial to prevent rot. Common in British homes, fascia boards protect roof edges from the elements, so proper installation is key for longevity and function.
How Far Apart Should Screws Be on Fascia Board?
For a proper fascia board installation, place screws every 30 centimetres along the board. Choose weather-resistant fasteners suitable for your board material. Ensure you have the right tools for secure attachment. Think of it like hanging a picture frame – you need evenly spaced fixings for stability. This approach ensures your fascia will stay put through wind and rain, protecting your roof’s edge for years to come.
Conclusion
Right, you’ve got the hang of fitting fascia capping boards. By following these steps, you’ve improved your home’s look and beefed up its protection against the weather. Don’t forget to keep an eye on them, though. Give them a regular once-over and clean to keep them in top shape. These new skills will come in handy for other DIY jobs around the house. It’s quite satisfying, isn’t it, seeing your own work safeguarding your home?


