

How to Repair Lead Flashing on a Roof
To repair lead flashing on a roof, start by inspecting it for any damage. Carefully remove any affected tiles to access the flashing. Use a lead knife to detach the old flashing, making sure to clean the area thoroughly. For new installations, cut the flashing to size, secure it with nails or screws, and seal the edges with roofing adhesive. If you’re dealing with minor cracks, a good sealant and waterproof tape will do the trick. If you’re interested in advanced methods like welding, there’s plenty more to learn.
Key Takeaways
- Inspect lead flashing for any damage, such as cracks or corrosion, to determine if repairs or a full replacement is necessary.
- Carefully remove surrounding tiles to access the flashing, taking care not to cause any additional damage.
- Thoroughly clean the damaged areas and apply roofing sealant or flashing tape to seal any cracks and ensure it’s watertight.
- If the damage is more severe, consider welding the flashing using the correct techniques and materials to maintain a proper seal.
- Regularly check and maintain your flashing to prevent leaks and extend the lifespan of your roof.
Removal and Preparation of Lead Flashing

When removing and preparing lead flashing on a roof, start by checking the condition of the lead. Look for splits, holes, or signs of wear. Assess for any corrosion or loose flashing, which might mean it needs to be replaced.
Carefully remove any surrounding tiles to access the flashing without causing damage. Use a lead knife to detach the flashing, ensuring to keep any reusable parts intact. Dispose of the old lead responsibly.
Clean the mating surfaces thoroughly, getting rid of any debris and old residues. Make sure the structure is sound and dry before reinstalling the flashing. This careful preparation is essential for a successful repair. Regular assessment by a competent roofer is recommended to ensure the longevity of the flashing.
Installing New Lead Flashing

Installing New Lead Flashing
Installing new lead flashing requires careful attention to detail to ensure a watertight seal and long-lasting protection.
Follow these straightforward steps for effective installation:
- Prepare the Surface: Clean the roof thoroughly and measure the flashing to ensure a proper fit, allowing for necessary overlaps. Make sure to inspect the roof surface for any damage or deterioration before proceeding. Assessing the surface condition is crucial to prevent further damage during installation.
- Secure the Flashing: Attach the flashing with roofing nails or screws, ensuring a snug fit. Use ledge straps to keep it in place and prevent any movement.
- Seal Joints: Apply roofing sealant or High-Tack Hybrid Adhesive to all edges and overlaps for optimal waterproof sealing.
Minor Repair Techniques for Lead Flashing
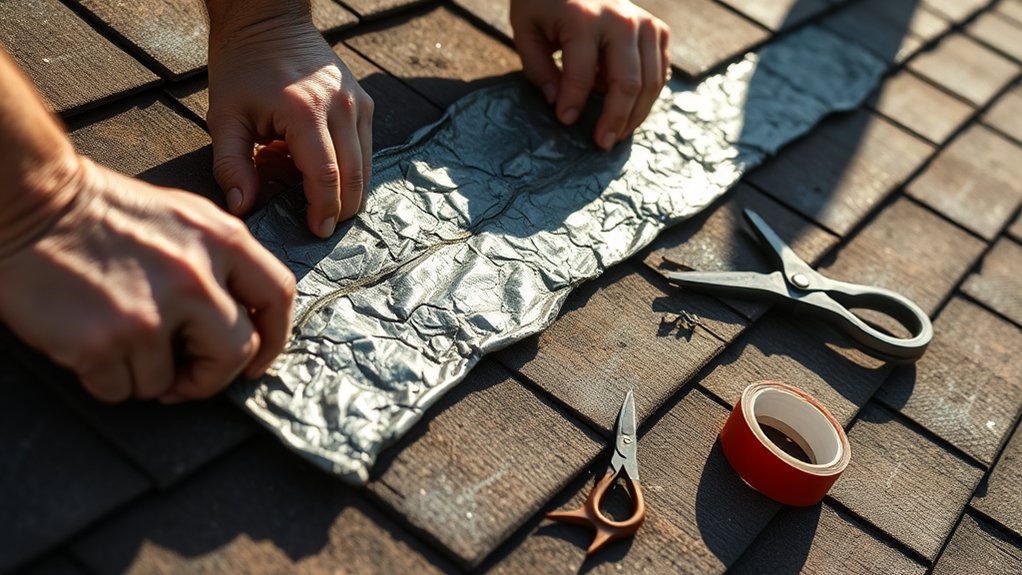
Regularly inspecting lead flashing for minor damage is essential to ensure your roof remains watertight. Start with a thorough inspection and clean the affected areas carefully. Use a caulking gun to apply roofing sealant into any cracks, ensuring a smooth finish. If tape is needed, choose high-quality flashing tape and ensure it covers the entire damaged area to create a waterproof seal. Remember that roof flashing is vital for preventing water from seeping into vulnerable areas of your roof.
Here’s a quick reference table for minor repair techniques:
| Repair Technique | Materials Needed | Key Steps |
|---|---|---|
| Crack Sealing | Roofing sealant, caulk | Apply sealant, smooth with a knife |
| Flashing Tape | Flashing tape | Clean area, apply tape tightly |
| Resealing Loose Sections | Roofing nails, screws | Secure flashing, avoid over-tightening |
| Surface Cleaning | Wire brush, putty knife | Remove debris, ensure area is dry |
| Final Inspection | Water test | Check for leaks after repairs |
Lead Welding and Specialist Repairs

Lead welding requires specialised skills and equipment, making it essential for effective repairs on lead flashing. Understanding the properties of lead and proper welding techniques will ensure lasting results.
Here are three key points to consider:
- Welding Techniques: Use oxy-acetylene or TIG welding set to low amperage to prevent burn-through, as lead melts at 621°F (327°C).
- Filler Metal: Use welding rods specifically designed for lead or create filler rods from the same lead material to ensure compatibility.
- Inspection: Regularly inspect your work while welding to avoid overheating or weak welds, which helps to ensure a watertight seal.
Tools, Materials, and Safety Considerations

Effective lead flashing repairs hinge on the right tools, materials, and safety precautions. Here’s a concise overview for your flashing maintenance project:
| Tools | Materials |
|---|---|
| Flashing pliers | Lead flashing rolls or sheets |
| Hammer | Roofing nails |
| Utility knife | Roofing sealant or tape |
| Pry bar | Roofing cement or mastic |
| Caulking gun | Replacement shingles or underlayment |
Safety is crucial. Always wear gloves to guard against lead exposure, use non-slip footwear, and secure a safety harness when working at height. Ensure proper ladder access and maintain clear communication with your partner to enhance safety during repairs. Regular inspections are vital for identifying potential problems before they lead to more significant damage.
Frequently Asked Questions
How Often Should I Inspect My Lead Flashing?
You should inspect your lead flashing at least twice a year, ideally in spring and autumn. After severe weather events, it’s wise to check more frequently to ensure the flashing is in good condition and to avoid costly repairs from hidden damage.
What Are the Signs of Lead Flashing Damage?
If you see water stains on your ceiling, it could indicate lead corrosion or leaks in the flashing. Look for visible cracks, warping, or gaps in the flashing; these are signs of serious damage that require urgent attention.
Can Lead Flashing Be Painted or Coated?
Yes, you can paint lead flashing. Using protective coatings, such as lead renovation paint, helps maintain lead flashing by waterproofing it, sealing it, and preventing deterioration. This not only extends its lifespan but also improves its appearance, while protecting surrounding materials from lead contamination.
How Do I Safely Dispose of Old Lead Flashing?
To safely dispose of old lead flashing, you need to adhere to hazardous waste regulations. Look into lead recycling options to reduce environmental harm, and ensure you use licensed facilities to avoid contamination and comply with local laws. For instance, local councils often provide guidance on where to take hazardous materials like lead.
Is Lead Flashing Suitable for All Roof Types?
Lead flashing isn’t suitable for every type of roof. While it provides advantages such as durability and flexibility, alternatives like aluminium or copper may be better for certain situations. It’s important to consider your roofing design and environmental factors to ensure you choose the right option. For instance, aluminium is lightweight and resistant to corrosion, making it a good choice for flat roofs, while copper can add a stylish touch to pitched roofs. Always assess your specific needs before deciding on the material.
Conclusion
In summary, repairing lead flashing on your roof may seem daunting, but with the right tools and techniques, you can manage it effectively. Whether you’re replacing old flashing or carrying out minor repairs, each step is crucial for ensuring a watertight seal. A well-maintained roof is vital; without it, you’re at risk of leaks and damage. So, gather your materials, prioritise safety, and ensure your roof remains robust for years to come!


