

Roofing Installation: Everything You Need to Know
A well-installed roof is vital for your home’s protection and value. You’ll need to understand roofing installation basics, plan your project carefully, and choose the right materials. Whether you’re considering DIY or hiring professionals, it’s essential to know the steps involved, from evaluating your current roof to installing new shingles. Don’t forget about proper ventilation, insulation, and flashing installation. Once your new roof is in place, regular maintenance and inspections will extend its lifespan. Understanding warranties and insurance is also crucial. By mastering these aspects, you’ll be well-equipped to tackle your roofing project with confidence and success.
Key Takeaways
- Understand roofing basics, including materials, structure, and components, to make informed decisions for your project.
- Plan your roofing project by assessing current conditions, exploring financing options, and obtaining necessary permits.
- Consider hiring a qualified roofing contractor to ensure proper installation, compliance with building codes, and warranty coverage.
- Follow proper installation techniques, including flashing installation, ventilation, and safety protocols during the process.
- Maintain your new roof through regular inspections, gutter maintenance, and prompt addressing of any issues to extend its lifespan.
Introduction
A well-installed roof is essential for protecting your home from the elements and maintaining its structural integrity.
In this guide, you’ll learn the essential steps and best practices for proper roof installation.
We’ll cover everything from safety measures to material selection, ensuring you have the knowledge to tackle your roofing project with confidence.
Importance of proper roof installation
Proper roof installation serves as the cornerstone of your home’s protection, ensuring longevity and safeguarding against the elements. When you invest in professional installation, you’re not just getting a new roof; you’re enhancing your home’s overall performance. A well-installed roof significantly impacts your property’s energy efficiency, weather protection, and aesthetic appeal.
| Benefits | Consequences of Poor Installation |
|---|---|
| Extended roof lifespan | Premature deterioration |
| Improved energy efficiency | Higher energy costs |
| Enhanced weather protection | Water damage and leaks |
| Increased property value | Decreased resale value |
Overview of what readers will learn
This extensive guide will walk you through the essential steps and considerations for a successful roof installation. You’ll learn about roofing materials, proper techniques, and the significance of roofing safety throughout the process.
We’ll cover critical aspects of roofing maintenance to guarantee your new roof’s longevity and cost efficiency.
In this all-inclusive guide, you’ll discover:
- How to evaluate your current roof and determine if a replacement is necessary
- The advantages and disadvantages of various roofing materials and their impact on your home’s aesthetics
- Step-by-step instructions for DIY repairs and when to seek professional help
We’ll also explore the financial aspects of roofing, assisting you in making informed decisions that balance quality and cost-effectiveness. By the end of this guide, you’ll be equipped with the knowledge to tackle your roofing project confidently and efficiently.
Understanding Roofing Basics

Before you start your roofing project, you’ll need to grasp the fundamentals. Familiarize yourself with various roofing materials, understand the basic roof structure and its components, and recognize the critical role of proper ventilation and insulation.
These key aspects will form the foundation of your roofing knowledge and help you make informed decisions throughout the installation process.
Types of roofing materials
When choosing a roofing material, you’ll encounter several popular options.
Asphalt shingles are the most common choice, while metal roofing offers durability and energy efficiency.
You can also consider tile roofing for a distinctive look, or explore other materials like slate, wood shakes, or synthetic options to find the best fit for your home.
Asphalt shingles
Asphalt shingles, the most popular roofing material in North America, offer a winning combination of durability, affordability, and ease of installation. They’re known for their:
- Weather resistance, protecting your home from various elements
- Simple installation process, reducing labor costs
- Moderate lifespan of 20-30 years with proper maintenance
When comparing costs, asphalt shingles are often more budget-friendly than other roofing materials.
Regular shingle maintenance can extend their lifespan and performance.
Metal roofing
Metal roofing stands out as a durable, long-lasting alternative to traditional shingles, offering homeowners exceptional protection and style. With numerous benefits, including minimal maintenance and impressive longevity, it’s a cost-effective choice in the long run. Let’s compare metal roofing to other materials:
| Feature | Metal | Asphalt | Tile |
|---|---|---|---|
| Lifespan | 50+ years | 20-30 years | 50+ years |
| Maintenance | Low | Moderate | Low |
| Cost | High initial | Low initial | High initial |
| Aesthetics | Versatile | Limited | Traditional |
| Energy efficiency | High | Moderate | High |
Tile roofing
Tile roofing offers a timeless, elegant look that’s been prized for centuries, combining durability with aesthetic appeal.
When considering tile roofing, keep these key points in mind:
- Durability: Tiles can last 50+ years with proper maintenance.
- Installation: It’s a complex process requiring professional expertise.
- Energy efficiency: Tiles provide excellent insulation, reducing energy costs.
You’ll find various aesthetic options to suit your style, but remember that regular maintenance is essential for longevity.
Other materials
While we’ve covered the most common roofing materials, you’ll find several other options that can suit specific needs or aesthetic preferences.
These include eco-friendly options like green roofs and solar tiles, which can reduce your carbon footprint. Rubber roofing offers a cost-effective solution for flat roofs, while synthetic slate provides a lightweight alternative to traditional slate.
Don’t forget roofing accessories and consider DIY repairs for minor maintenance tasks.
Roof structure and components
Before starting any roofing project, it’s important to understand the basic structure and components that make up a roof. The roof structure consists of several layers, each serving a specific purpose in protecting your home from the elements.
When considering material options and installation techniques, you’ll need to focus on:
- Weather resistance: Choose materials that can withstand your local climate conditions
- Energy efficiency: Select components that help regulate your home’s temperature
- Durability: Opt for high-quality materials that will last for years to come
Key components of a roof include the decking, underlayment, flashing, and shingles or other outer covering. Each element plays an essential role in maintaining your roof’s integrity.
Understanding these basics will help you make informed decisions about your roofing project and guarantee a successful installation that provides long-lasting protection for your home.
Importance of proper ventilation and insulation
Beyond the structural components, proper ventilation and insulation are key factors in creating an effective and efficient roofing system for your home. Ventilation benefits include regulating temperature and preventing moisture buildup, while insulation importance lies in maintaining energy efficiency and comfort. Proper airflow helps prevent ice dams and extends your roof’s lifespan.
Here’s a quick overview of ventilation and insulation benefits:
| Aspect | Ventilation | Insulation |
|---|---|---|
| Temperature | Regulates attic heat | Maintains indoor comfort |
| Moisture | Prevents condensation | Reduces humidity |
| Energy | Reduces cooling costs | Improves efficiency |
| Longevity | Extends roof life | Protects materials |
| Comfort | Improves air quality | Stabilizes indoor climate |
Planning Your Roofing Project

Before you start your roofing project, you’ll need to carefully assess your current roof’s condition and decide whether repair or replacement is the best option.
Next, create a budget and explore financing options to guarantee you can cover the costs.
Don’t forget to obtain all necessary permits and schedule required inspections to comply with local regulations and guarantee your project meets safety standards.
Assessing your current roof condition
A thorough evaluation of your existing roof’s condition is essential for planning a successful installation or replacement project. Begin with a detailed roof inspection, either DIY or professional, to assess its current state. Look for signs of damage, wear, and potential issues that may affect your project.
During your condition assessment, pay attention to:
- Visible damage: Check for missing shingles, cracks, or sagging areas
- Interior signs: Look for water stains, mold, or daylight visible through the roof
- Age: Consider the roof’s age and expected lifespan for its material type
Based on your findings, determine whether repairs or a full replacement is necessary. While some maintenance tasks can be DIY, complex issues often require professional expertise.
Regular inspections and prompt repairs can extend your roof’s life, potentially saving you money in the long run.
Deciding between repair and replacement
Once you’ve assessed your roof’s condition, you’ll need to make an important decision: should you repair the existing roof or opt for a full replacement? This choice depends on several factors.
First, consider the cost comparison between repairs and a new installation. While repairs may seem cheaper initially, they mightn’t be cost-effective in the long run.
Longevity considerations are pivotal; a new roof will last longer and provide better protection. Visual aesthetics also play a role, as a fresh roof can significantly enhance your home’s appearance.
Don’t forget the environmental impact; newer roofing materials are often more eco-friendly and energy-efficient.
Budgeting and financing options
Your roofing project’s success hinges on a well-planned budget and understanding your financing options. Start by creating a detailed cost breakdown, including materials, labor, and potential unforeseen expenses.
When it comes to financing, you’ve got several options to ponder:
- Home equity loans or lines of credit
- Personal loans from banks or credit unions
- Contractor-offered payment plans
Don’t forget to shop around for the best loan options and interest rates. Many roofing companies also offer financing options, which can be convenient but may come with higher interest rates.
As you plan your budget, factor in the long-term value of your investment. A quality roof can increase your home’s value and energy efficiency, potentially offsetting initial costs. Remember to set aside a contingency fund for unexpected issues that may arise during the installation process.
Obtaining necessary permits and inspections
With your budget in place, it’s time to tackle the legal requirements of your roofing project by securing the necessary permits and scheduling inspections. Start by contacting your local building department to understand the permit process and inspection requirements.
You’ll need to submit detailed plans and pay permit fees, which vary depending on your location and project scope. Be prepared for multiple inspections throughout the installation, including pre-roofing, underlayment, and final inspections.
Regulatory compliance is essential, so make sure you’re following all local building codes and guidelines. Plan for inspection timelines, as they can impact your project schedule.
Choosing the Right Roofing Material
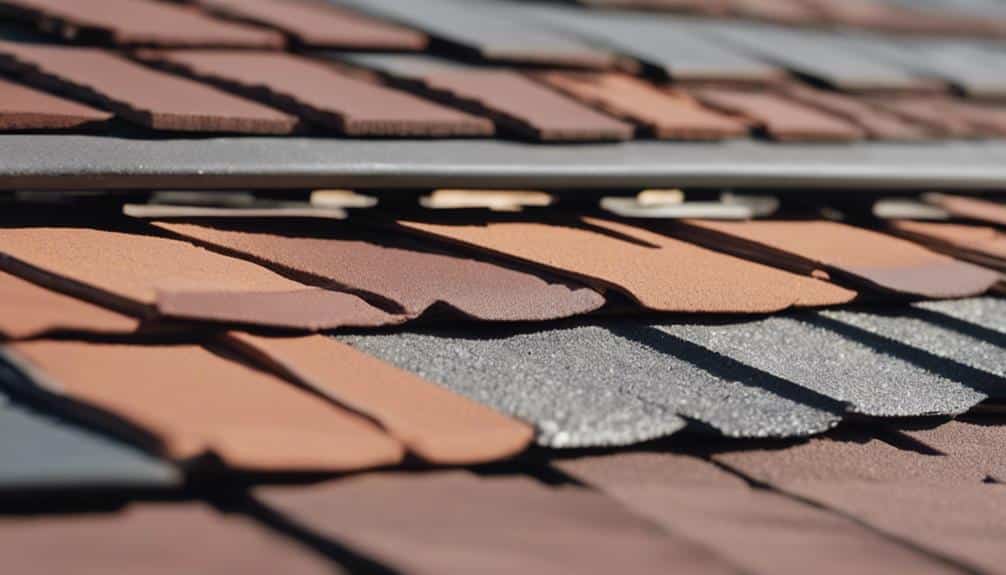
When selecting your roofing material, you’ll need to weigh the pros and cons of different options, from traditional asphalt shingles to metal or tile. Consider factors like durability, cost, local climate, and your home’s architectural style to make the best choice.
Don’t forget to evaluate energy efficiency and environmental impact, as these can affect your long-term costs and ecological footprint.
Pros and cons of different materials
Several popular roofing materials offer unique advantages and drawbacks that you’ll need to weigh before making your choice. When comparing options, consider these key factors:
- Cost and durability: Asphalt shingles are budget-friendly but have a shorter lifespan, while metal roofs cost more upfront but can last decades.
- Aesthetic appeal and maintenance: Clay tiles offer a distinctive look but require more upkeep, whereas slate provides a timeless appearance with minimal maintenance.
- Environmental impact: Green roofs promote sustainability but demand specific structural requirements, while synthetic materials offer eco-friendly alternatives to traditional options.
You’ll want to balance these aspects based on your priorities. For instance, if you’re looking for a long-lasting, low-maintenance option, metal or slate might be ideal. However, if initial cost is your primary concern, asphalt shingles could be the way to go. Consider your climate and local architectural styles as well.
Factors to consider
When choosing the right roofing material, you’ll need to weigh several key factors. Your local climate, the architectural style of your home, your budget constraints, and the desired lifespan of your roof all play essential roles in this decision.
Climate
Climate plays a pivotal role in determining the most suitable roofing material for your home.
Consider these climate-related factors when choosing your roof:
- Weather resistance: Guarantee your roofing can withstand local weather patterns
- Insulation benefits: Select materials that offer prime temperature control
- Energy efficiency: Choose roofing that helps reduce heating and cooling costs
Roofing durability and climate considerations are essential for long-lasting protection.
You’ll want a material that balances these factors effectively.
Home style
Your home’s architectural style greatly influences the choice of roofing material, as certain materials complement specific designs better than others. Consider these roofing options to enhance your home’s aesthetics and follow current trends:
| Architectural Style | Recommended Roofing | Popular Trends |
|---|---|---|
| Colonial | Asphalt shingles | Dark colors |
| Mediterranean | Clay tiles | Terracotta |
| Modern | Metal roofing | Sleek profiles |
| Craftsman | Wood shakes | Natural tones |
| Victorian | Slate tiles | Ornate patterns |
Choose a roofing style that aligns with your exterior design for a cohesive look.
Budget
Although aesthetics and durability are essential, your budget often plays the most significant role in determining the roofing material you’ll choose for your home.
When considering price, keep these cost-saving tips in mind:
- Compare quotes from multiple contractors
- Explore financing options for larger projects
- Consider DIY alternatives for minor repairs
Allocate your budget wisely, balancing quality and affordability.
Longevity
When it comes to selecting a roofing material, you’ll want to take into account its longevity as a key factor in your decision-making process. Consider maintenance tips, common issues, and warranty coverage to maximize your roof’s lifespan. The material you choose can impact your insurance rates and future trends in roofing technology.
| Material | Lifespan | Maintenance |
|---|---|---|
| Asphalt | 20-30 yrs | Moderate |
| Metal | 40-70 yrs | Low |
| Slate | 75-100+ yrs | Minimal |
Energy efficiency and environmental considerations
In today’s eco-conscious world, energy efficiency and environmental impact are important factors to take into account when selecting your roofing material. When considering energy efficiency benefits and eco-friendly options, you’ll want to explore green roofing solutions that align with sustainable practices. These choices can significantly reduce your environmental impact while also saving you money on energy bills.
Some key considerations for energy-efficient and environmentally friendly roofing include:
- Reflective materials: Choose light-colored or specially coated roofing that reflects sunlight, reducing heat absorption.
- Insulation properties: Opt for materials with high insulation values to minimize heat transfer.
- Recyclability: Select roofing materials that can be recycled at the end of their lifespan.
Finding and Hiring a Qualified Roofing Contractor

When it comes to roofing installation, you’ll need to decide between tackling the project yourself or hiring professionals.
To find a qualified contractor, you should research local options, check credentials, and read customer reviews.
Once you’ve narrowed down your choices, prepare a list of questions about their experience, licensing, and insurance, and carefully review their quotes and contract terms before making a final decision.
Importance of hiring professionals vs. DIY
Choosing between professional roofing installation and a DIY approach can greatly impact the quality, longevity, and safety of your roof. While DIY might seem cost-effective initially, it’s essential to keep in mind the long-term implications.
Professional roofers bring expertise, experience, and proper safety equipment to the job, reducing the risk of accidents and guaranteeing compliance with local building codes.
Keep these factors in mind when deciding:
- Skill requirements: Roofing demands specialized knowledge and techniques that professionals have perfected over years.
- Time commitment: DIY projects often take longer, leaving your home susceptible to weather damage.
- Warranty implications: Professional installations typically come with warranties, safeguarding your investment.
Cost considerations should extend beyond initial expenses to include potential repairs and replacements. Safety precautions are essential, as roofing work involves significant risks. Ultimately, hiring professionals often proves more cost-effective and ensures a high-quality, durable roof for your home.
How to research and evaluate contractors
The quest for a qualified roofing contractor begins with thorough research and careful evaluation of potential candidates. Start by checking contractor qualifications, ensuring they’re licensed, insured, and experienced in your specific roofing needs.
Look for pricing transparency, as reputable contractors provide detailed, written estimates. Don’t overlook customer reviews; they offer valuable insights into a contractor’s work quality and reliability.
Pay attention to communication skills during initial interactions. A professional who listens to your concerns and explains processes clearly is more likely to deliver satisfactory results. Discuss the project timeline upfront, ensuring it aligns with your expectations. Ask about potential delays and how they’re handled.
Questions to ask potential contractors
Armed with a list of potential contractors, you’ll want to ask each one a set of important questions to help narrow down your choices and make certain you’re hiring the best professional for your roofing project. Focus on contractor qualifications, pricing estimates, and project timelines to get a clear picture of what to expect. Don’t forget to inquire about previous projects and warranty details to make sure you’re making an informed decision.
Here are three essential questions to ask potential contractors:
- Can you provide proof of licensing, insurance, and certifications?
- What’s your estimated timeline for completing the project, and how do you manage unexpected delays?
- Do you offer a detailed, written contract that includes pricing, materials, and warranty information?
Understanding quotes and contracts
Once you’ve narrowed down your list of potential contractors, it’s time to focus on understanding the quotes and contracts they provide. Pay close attention to price transparency, ensuring that all costs are clearly itemized.
During contract negotiation, don’t hesitate to ask for clarification on any unclear terms. Prioritize legal protections by ensuring the contract includes specifics about liability insurance and worker’s compensation.
Carefully review the warranty coverage offered, including both materials and workmanship guarantees. Examine the payment terms closely, and be wary of contractors demanding full payment upfront.
A typical schedule might involve a deposit, progress payments, and final payment upon satisfactory completion. Remember, a well-written contract protects both you and the contractor.
If you’re unsure about any aspect of the agreement, consider having a lawyer review it before signing.
The Roof Installation Process: Step-by-Step

Now that you’ve hired a qualified roofing contractor, it’s time to understand the step-by-step process of roof installation.
Your property will need preparation, and the old roof must be removed before the new underlayment, ice barriers, and flashing can be installed.
Preparing your property for installation
Before the roofing crew arrives, you’ll need to take several key steps to prepare your property for the installation process. Start with a thorough property inspection, checking for any existing damage or issues that might affect the installation.
Next, consider your landscaping: trim trees near the roof, cover plants, and clear the area around your home for easy access and debris collection.
Don’t forget to take weather protection measures and implement safety precautions. Here are three essential steps:
- Cover attic items with tarps to protect them from dust and debris.
- Remove or secure outdoor furniture and decorations.
- Inform neighbors about the upcoming work to minimize disruptions.
Removing the old roof
With the preparation complete, your roofing team will begin the important task of removing the existing roof material. This critical step in roof preparation requires careful attention to safety precautions and proper disposal methods.
The team will use specialized roofing tools, such as pry bars and roofing shovels, to strip away old shingles, underlayment, and flashing. They’ll work systematically, starting from the top and moving downward, to ensure all debris is collected efficiently.
During this process, it’s essential to have professional assistance to prevent damage to your home’s structure and avoid personal injury. Your roofing team will set up tarps or drop cloths to catch falling debris and protect your property.
They’ll also inspect the underlying deck for any damage or rot that may need addressing before the new roof installation begins. This thorough removal process sets the stage for a successful roof replacement.
Installing underlayment and ice barriers
The first vital step in laying your new roof involves installing a strong underlayment and effective ice barriers. This process is essential for proper installation and provides waterproof protection for your home. Here’s why it’s important:
- Underlayment benefits include an additional layer of defense against water infiltration and improved roof deck protection.
- Ice barriers act as a crucial barrier, preventing water from seeping under shingles during freeze-thaw cycles.
- Proper installation of these components is key to ice dam prevention, especially in colder climates.
Start by laying the ice barrier along the eaves, extending it at least 24 inches past the interior wall line. Then, install the underlayment, overlapping each row by about 4 inches. Pay special attention to valleys and other vulnerable areas.
Proper flashing techniques
Proper flashing techniques are necessary for your roof’s ability to redirect water and prevent leaks in vulnerable areas. To guarantee effective water protection and leak prevention, you’ll need to master these key flashing methods:
| Flashing Type | Proper Installation Technique |
|---|---|
| Step Flashing | Install in layers with shingles |
| Valley Flashing | Overlap and seal for maximum protection |
| Chimney Flashing | Use counter-flashing for added security |
| Vent Pipe Flashing | Ensure snug fit around pipes |
| Drip Edge Flashing | Install under underlayment at eaves |
When installing flashing, always use corrosion-resistant materials to prevent rust. Overlap pieces by at least 2 inches and secure them with roofing nails. Apply a bead of roofing sealant along the edges for added water protection. Remember, proper installation of flashing is vital for maintaining your roof’s integrity and preventing costly water damage. Don’t rush this step – take your time to make sure each piece is correctly placed and sealed.
Installing the new roofing material
Once you’ve completed the preparatory steps, it’s time to get to the heart of your roofing project: installing the new roofing material. Before you begin, make sure you have all the necessary roofing tools and safety precautions in place.
The installation steps will vary depending on your chosen material options, but some general roofing techniques apply across the board.
Here’s a basic outline of the process:
- Start at the bottom edge of the roof and work your way up
- Overlap each row of shingles or tiles to guarantee proper water drainage
- Secure each piece using the appropriate fastening method for your material
Remember to follow manufacturer guidelines for specific installation steps.
As you work, maintain proper safety practices, including using a harness and non-slip footwear. With careful attention to detail and the right techniques, you’ll achieve a durable and attractive roof.
Ventilation and finishing touches
After installing the main roofing material, you’ll need to address ventilation and add finishing touches to complete your roof installation.
Proper ventilation techniques are essential for maintaining your roof’s longevity and energy efficiency. Install ridge vents, soffit vents, or gable vents to guarantee adequate airflow, which helps regulate temperature and moisture levels in your attic.
For finishing touches, focus on roof aesthetics and design. Install flashing around chimneys, vents, and skylights to prevent water infiltration. Add drip edges along the roof’s perimeter to divert water away from fascia boards. Don’t forget to set up gutters and downspouts for proper water drainage.
Finally, consider adding decorative elements like finials or weathervanes to enhance your roof’s appearance. These finishing touches not only improve your roof’s functionality but also enhance your home’s curb appeal.
Safety Considerations During Installation
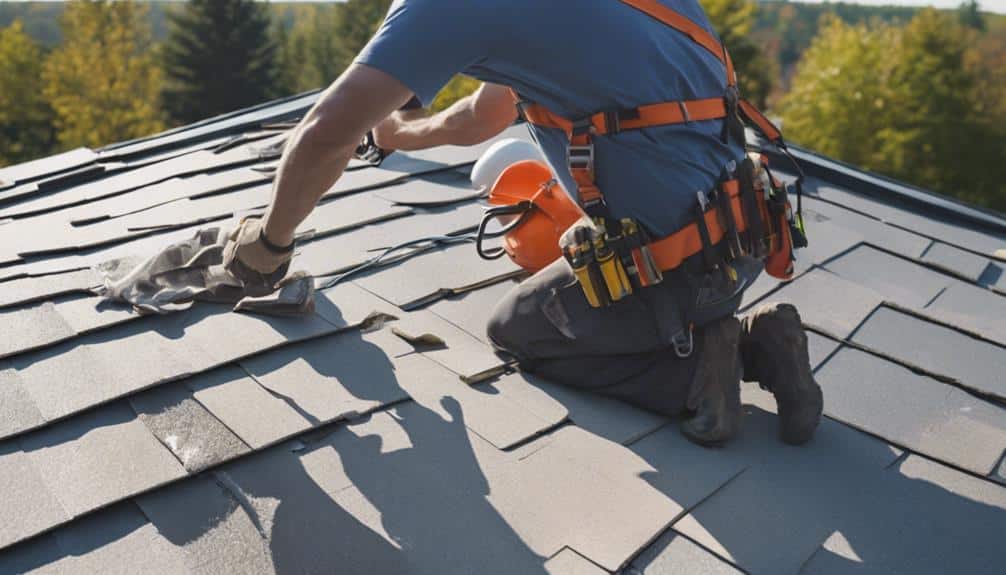
Safety should be your top priority during a roofing installation. Contractors must use proper equipment, including harnesses, non-slip footwear, and protective gear, while following OSHA guidelines.
As a homeowner, you’ll need to keep children and pets away from the work area, secure loose items in your yard, and be prepared for noise and debris during the project.
Contractor safety measures and equipment
Protecting your crew should be your top priority when installing roofs, so it’s crucial to implement proper safety measures and provide appropriate equipment.
Establish clear safety protocols and make sure all workers are trained in equipment use and emergency response procedures. Require protective gear, including hard hats, safety glasses, and non-slip footwear. Implement fall prevention strategies, such as safety harnesses and guardrails.
To enhance safety, focus on these key areas:
- Regular equipment inspections: Check tools, ladders, and scaffolding before each use.
- Weather monitoring: Be mindful of conditions that could compromise safety, like high winds or rain.
- Communication systems: Establish clear channels for reporting hazards or emergencies on the job site.
Homeowner precautions during the project
While roofing professionals handle the majority of the installation, you’ll need to take several precautions to secure your family’s safety during the project.
First, limit your homeowner involvement by staying clear of work areas and keeping children and pets indoors. Monitor progress from a safe distance, making certain you’re available for questions or concerns. Maintain clear communication with your contractor about daily schedules and potential hazards.
You should also review your insurance coverage to make certain you’re protected during the renovation. Additional safety precautions include securing loose items in your yard, covering valuable landscaping, and parking vehicles away from the work zone.
If you need to access your attic, wait until workers have finished for the day. By following these guidelines, you’ll contribute to a safer work environment and smoother installation process.
Quality Control and Inspection
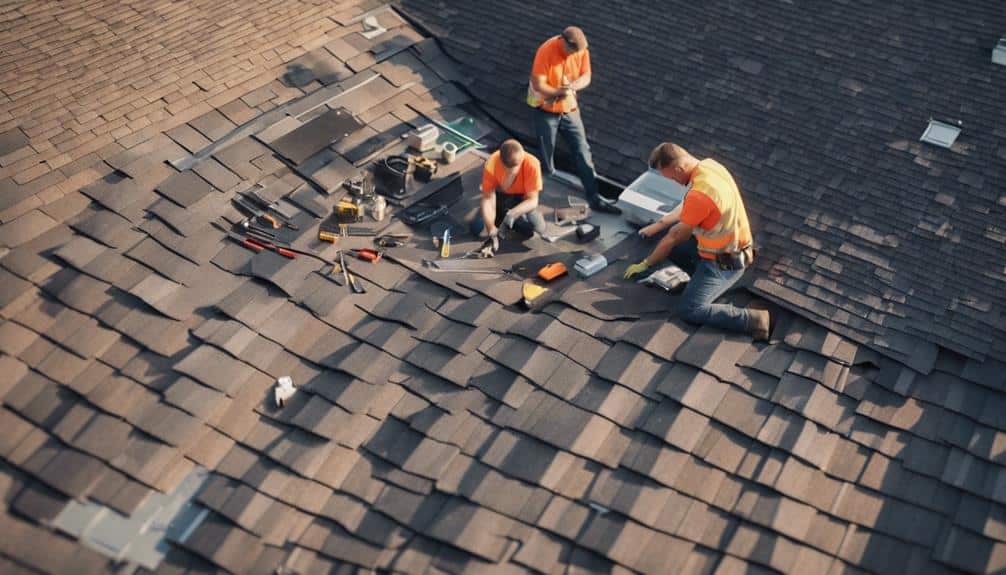
After installation, you’ll want to confirm your roof meets quality standards. Look for proper shingle alignment, secure fastening, and correct flashing installation as indicators of a well-executed job.
Don’t forget to schedule a final inspection and review your warranty terms to protect your investment.What to look for in a properly installed roof
To secure your roof’s longevity and performance, you’ll need to know the key indicators of a properly installed roofing system. During a roof inspection, look for signs of a meticulous installation process and proper techniques.
Here are three vital aspects to examine:
- Even shingle alignment: Rows should be straight and evenly spaced.
- Proper flashing: Check for securely installed flashing around chimneys, vents, and valleys.
- Adequate ventilation: Confirm proper attic ventilation to prevent moisture buildup.
Be vigilant for signs of damage, such as missing shingles, exposed nails, or sagging areas. Regular maintenance is essential for preserving your roof’s integrity.
Schedule annual inspections and address issues promptly to avoid costly repairs. By familiarizing yourself with these indicators, you’ll be better equipped to assess your roof’s condition and guarantee it’s protecting your home effectively.
Final inspections and warranties
Once your new roof is installed, you’ll want to verify it meets all quality standards and is backed by proper warranties. The inspection process typically involves a thorough examination by both the contractor and a local building inspector. Your contractor is responsible for ensuring the roof passes all required inspections and adheres to local building codes.
Pay close attention to warranty coverage and duration. Most reputable roofing companies offer warranties ranging from 20 to 50 years, depending on the materials used. However, these warranties often come with specific maintenance requirements you’ll need to follow to keep them valid.
Be sure to understand your responsibilities, such as regular cleaning and inspections, to maintain your warranty coverage. Keep all documentation related to your roof installation, including warranties and inspection reports, in a safe place for future reference.
Maintaining Your New Roof
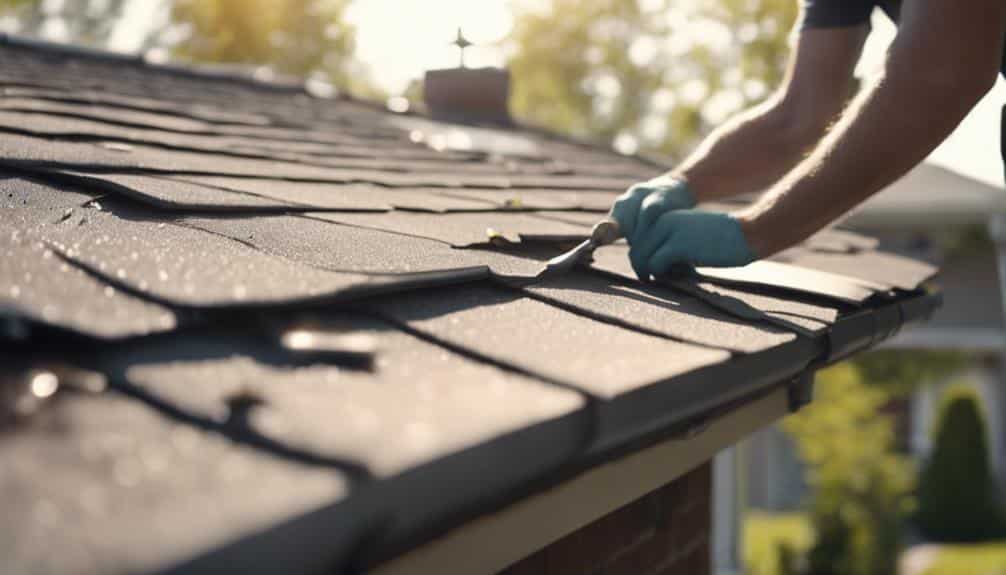
To keep your new roof in peak condition, you’ll need to follow regular maintenance practices and stay vigilant for potential issues. Schedule professional inspections at least once a year to catch problems early and extend your roof’s lifespan.
Regular maintenance tips
Regular upkeep is key to extending your new roof’s lifespan and preserving its performance. To keep your roof in top condition, focus on these essential tasks:
- Seasonal cleaning: Remove debris, leaves, and branches from your roof and gutters twice a year, typically in spring and fall.
- Gutter maintenance: Verify your gutters are clear and properly aligned to prevent water buildup and potential damage.
- Roof inspections: Schedule professional inspections annually to catch minor issues before they become major problems.
Don’t forget to conduct regular leak detection checks, especially after severe weather events. Look for water stains on ceilings or walls, which may indicate a roof leak.
If you notice any damaged or missing shingles, address them promptly through shingle replacement. By staying proactive with these maintenance tasks, you’ll safeguard your investment and avoid costly repairs down the line.
When to schedule professional inspections
Professional roof inspections should be scheduled at least once a year to guarantee your roof’s longevity and performance. While DIY inspections are helpful, they can’t replace the expertise of a professional roofer.
Consider scheduling inspections more frequently if you live in an area with extreme weather conditions, as severe storms can deeply impact your roof’s lifespan.
You should also arrange a professional inspection after any major weather event, such as a hailstorm or hurricane. These experts can spot potential issues that you might miss, preventing small problems from becoming costly repairs.
Remember, regular roofing maintenance is key to extending your roof’s life. By investing in professional inspections, you’re not only ensuring your roof’s current condition but also planning for its future.
Don’t wait for visible damage to appear; proactive inspections can save you money and stress in the long run.
Addressing common issues and repairs
Even with proper installation and regular maintenance, your new roof may encounter common issues that require timely repairs. To address these problems effectively, you’ll need to be familiar with common issues, repair techniques, and DIY solutions.
Here are some maintenance tips to help you deal with roof-related challenges:
- Leak prevention: Regularly inspect your roof for missing or damaged shingles, and replace them promptly to prevent water infiltration.
- Flashing repairs: Check metal flashing around chimneys, vents, and skylights for signs of damage or separation, and reseal as necessary.
- Gutter maintenance: Keep gutters clean and properly aligned to make sure of proper water drainage and prevent ice dams.
Understanding Warranties and Insurance
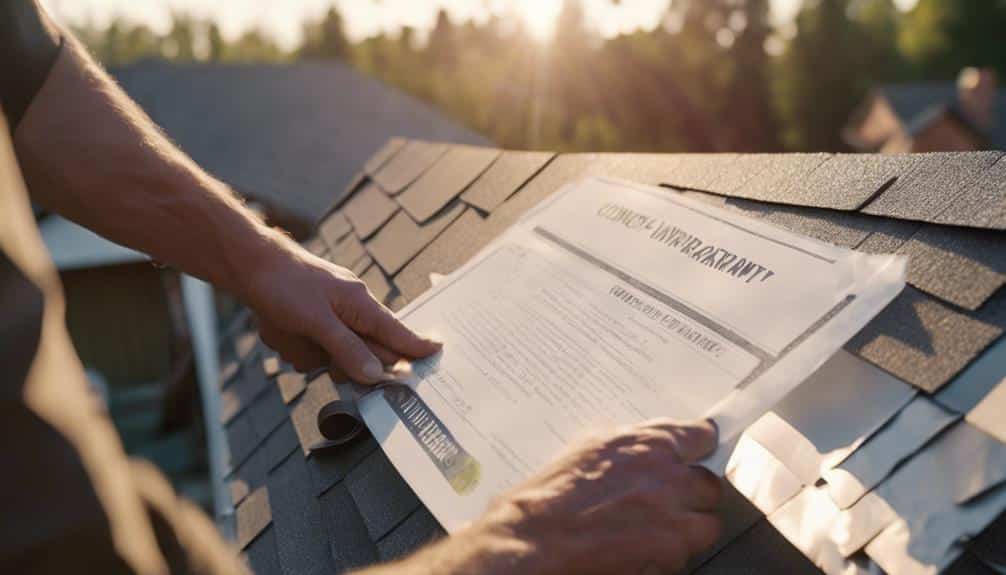
You’ll want to familiarize yourself with different types of roofing warranties to protect your investment. These may include manufacturer’s warranties for materials and contractor’s warranties for workmanship.
Additionally, it’s important to understand how your new roof installation might impact your home insurance coverage and potentially lead to premium adjustments.
Types of roofing warranties
When considering roofing warranties, you’ll typically encounter two main types: manufacturer warranties and workmanship warranties.
Manufacturer warranties cover defects in the roofing materials themselves, often for a specified period.
Workmanship warranties, provided by your roofing contractor, protect against installation errors and typically last for a shorter duration than manufacturer warranties.
Manufacturer warranties
Most roofing manufacturers offer inclusive warranties that protect homeowners against defects in materials and workmanship for a specified period.
When considering manufacturer warranties, pay attention to:
- Warranty coverage: Understand what’s included and excluded
- Claim process: Know how to file and what documentation you’ll need
- Fine print: Read carefully for limitations and exclusions
Look for extended options and transferability benefits to maximize your protection.
Always review the warranty’s terms before purchase.
Workmanship warranties
In addition to manufacturer warranties, reputable roofing contractors often provide workmanship warranties to cover installation-related issues. These warranties typically offer extended protection for a specified period, addressing contractor responsibility for any defects in their work.
Be sure to understand the warranty coverage, including its limitations and the claims process. Remember, workmanship warranties complement manufacturer warranties, providing you with all-encompassing protection for your new roof.
How roofing affects home insurance
Your roof’s condition and quality play a significant role in determining your home insurance rates and coverage options. Insurance companies assess roof damage risk when setting premium rates and defining policy requirements. A well-maintained, newer roof can lead to lower premiums and better coverage, while an older or damaged roof may result in higher costs or limited protection.
When it comes to roofing and insurance, keep these main points in mind:
- Regular roof inspections can help you maintain sufficient insurance coverage and avoid claim denials.
- Some insurers offer discounts for impact-resistant or weather-resistant roofing materials.
- Understanding your policy’s roof-related clauses is essential for a smooth claim process if damage occurs.
Always inform your insurance provider about any significant roofing work or upgrades you’ve completed. This guarantees your policy remains up-to-date and you’re fully protected in case of unexpected roof damage.
Roofing Innovations and Future Trends
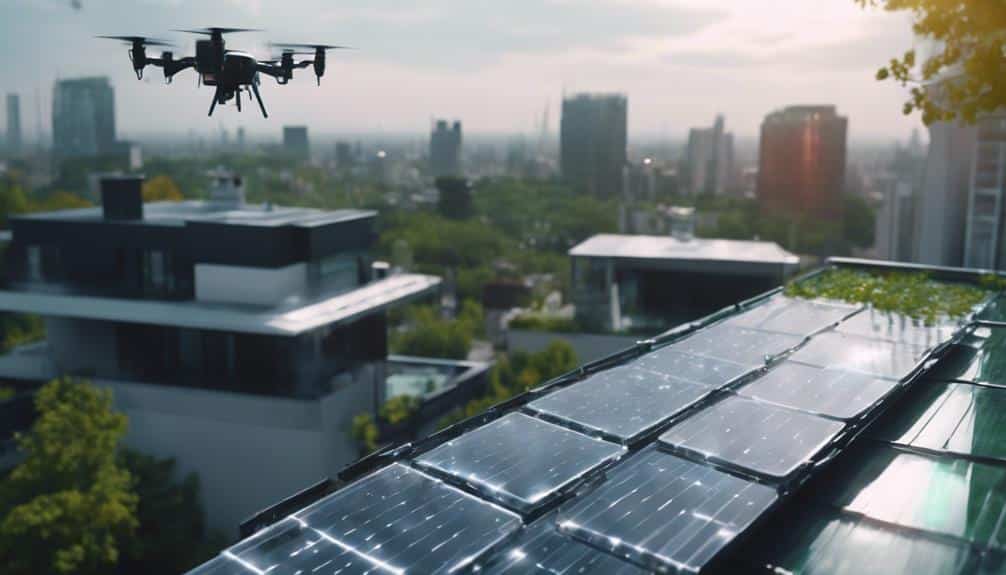
As you consider roofing options, it’s important to stay informed about the latest innovations in the industry. New materials and technologies are constantly emerging, offering improved durability, energy efficiency, and ease of installation.
You’ll also find an increasing number of sustainable roofing options, which can help reduce your environmental impact and potentially lower energy costs.
New materials and technologies
Revolutionary advancements in roofing materials and technologies are reshaping the industry, offering homeowners more durable, energy-efficient, and sustainable options than ever before. You’ll find a wide range of eco-friendly options, including recycled shingles and cool roofing systems that reflect sunlight and reduce heat absorption. Smart technology is also making its way into roofing, with integrated sensors that can detect leaks and monitor your roof’s performance.
Advanced materials are transforming the roofing landscape, providing cost-effective solutions that enhance energy efficiency and longevity.
Here are three innovative roofing technologies to explore:
- Solar tiles that seamlessly blend with traditional roofing materials
- Self-healing membranes that can repair minor damage automatically
- Aerogel insulation for superior thermal performance
These cutting-edge options not only improve your home’s energy efficiency but also offer long-term savings on maintenance and utility costs.
Sustainable roofing options
Sustainable roofing options have emerged as a cornerstone of modern construction, offering eco-friendly solutions that align with growing environmental consciousness and stricter building regulations.
You’ll find a variety of choices that can considerably reduce your home’s climate impact. Green roofs, adorned with vegetation, provide natural insulation and absorb rainwater. Solar panels transform your roof into a power generator, boosting energy efficiency and cutting electricity costs. Recycled materials, such as rubber or plastic shingles, offer durability while diverting waste from landfills.
These sustainable options not only benefit the environment but can also increase your property’s value. When selecting a roofing system, consider its long-term energy efficiency and environmental impact. By choosing sustainable roofing, you’re investing in both your home and the planet’s future.
Conclusion

As you’ve learned throughout this guide, proper roofing installation involves multiple important steps and considerations.
From selecting the right materials to following safety protocols and implementing advanced techniques, every aspect plays a significant role in ensuring a durable, weather-resistant roof.
Recap of key points
Throughout this guide, you’ve learned the essential steps for a successful roofing installation. Let’s recap some key highlights and installation tips to guarantee you avoid common mistakes:
- Proper preparation:
- Always inspect your roof deck.
- Replace damaged sheathing.
- Install a high-quality underlayment.
- Material selection:
- Choose roofing materials that suit your climate.
- Consider your budget and aesthetic preferences.
- Safety first:
- Use appropriate safety gear.
- Follow expert advice on ladder placement and fall protection.
Importance of investing in quality roofing installation
Investing in quality roofing installation isn’t just a luxury—it’s an essential step in protecting your home and guaranteeing long-term peace of mind. When you prioritize professional installation, you’re setting yourself up for numerous long-term benefits.
A well-installed roof greatly enhances your property value, making it a wise investment for the future. The durability factor of a properly installed roof can’t be overstated; it’ll withstand harsh weather conditions and require fewer repairs over time. Quality installation also ensures that your roof meets or surpasses safety standards, providing essential protection for you and your family.
Additionally, a professionally installed roof contributes to your home’s energy efficiency, potentially lowering your utility bills. By choosing quality installation, you’re not just getting a roof—you’re investing in your home’s future, safety, and overall performance.
Frequently Asked Questions
How Long Does a Typical Roof Installation Take From Start to Finish?
You’ll find that a typical roof installation takes 1-3 days. The timeline depends on roofing materials, crew size, and potential weather delays. Don’t forget to factor in time for the final roofing inspection after completion.
Can I Stay in My Home During the Roof Installation Process?
Like a beehive, your home buzzes with activity during roof installation. You can stay, but consider safety concerns, noise levels, and weather conditions. Discuss alternative accommodations with contractors. Clear communication guarantees you’re prepared for the process.
What Happens if It Rains During My Roof Installation?
If it rains during your roof installation, you’ll face rain delays. To prevent water damage and mold, your contractor will use protective measures. Check your insurance coverage for potential issues. Be prepared for scheduling conflicts due to weather-related postponements.
Are There Any Hidden Costs I Should Be Aware Of?
You should be aware of potential hidden costs. These can include unexpected expenses for additional materials, increased labor fees, permit costs, and warranty options. Always discuss these possibilities with your contractor before starting the roofing project.
How Much Weight Will the New Roof Add to My House?
You’ll find roof weight varies greatly. Consider your home’s structural impact and load capacity. Different roofing types have unique weight considerations. Proper weight distribution guarantees stability. The right choice can positively impact your property’s resale value.
Conclusion
You’re now equipped with the knowledge to tackle your roofing project confidently.
Remember, a well-installed roof is your home’s first line of defense.
Take John’s case: he used this guide to oversee his roof replacement, saving money and ensuring quality.
Whether you’re DIYing or hiring pros, stay informed and proactive.
With proper planning, execution, and maintenance, your new roof will protect your home for decades to come.
Happy roofing!


